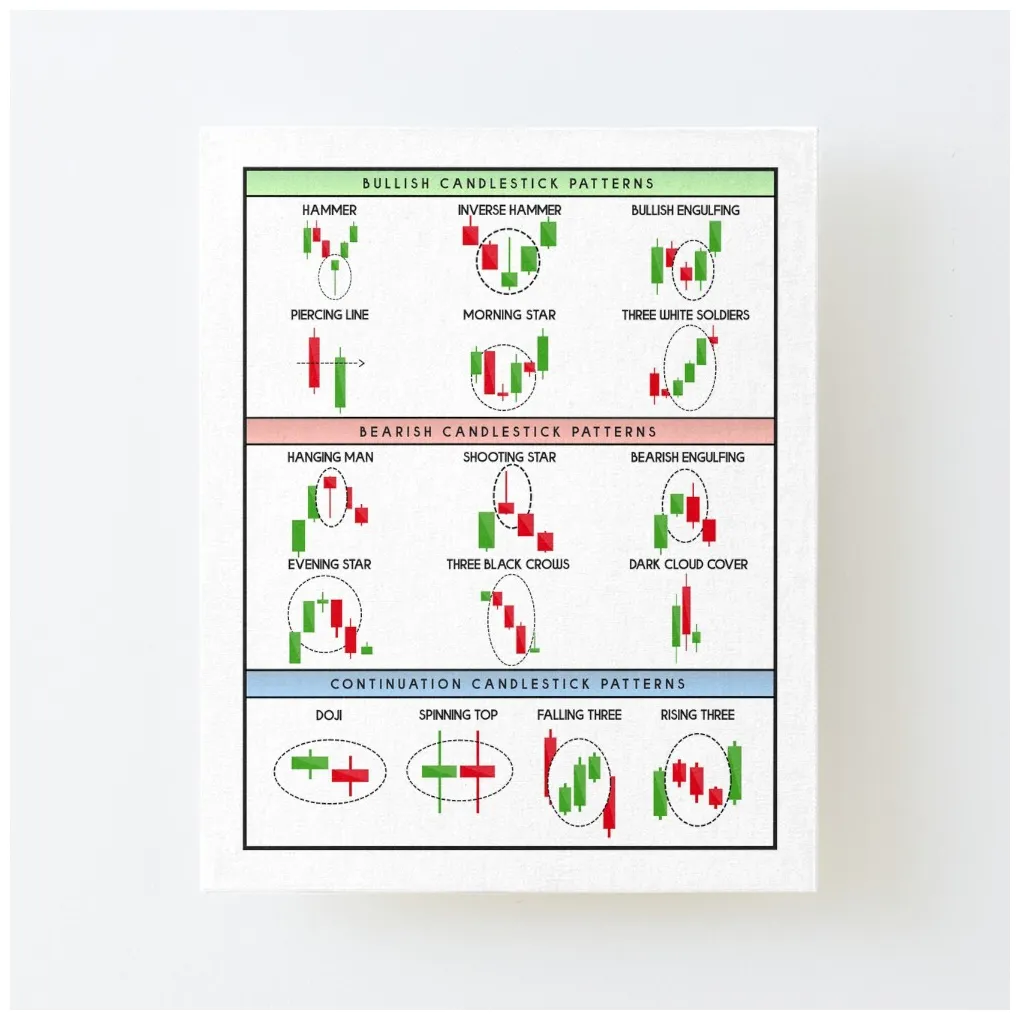
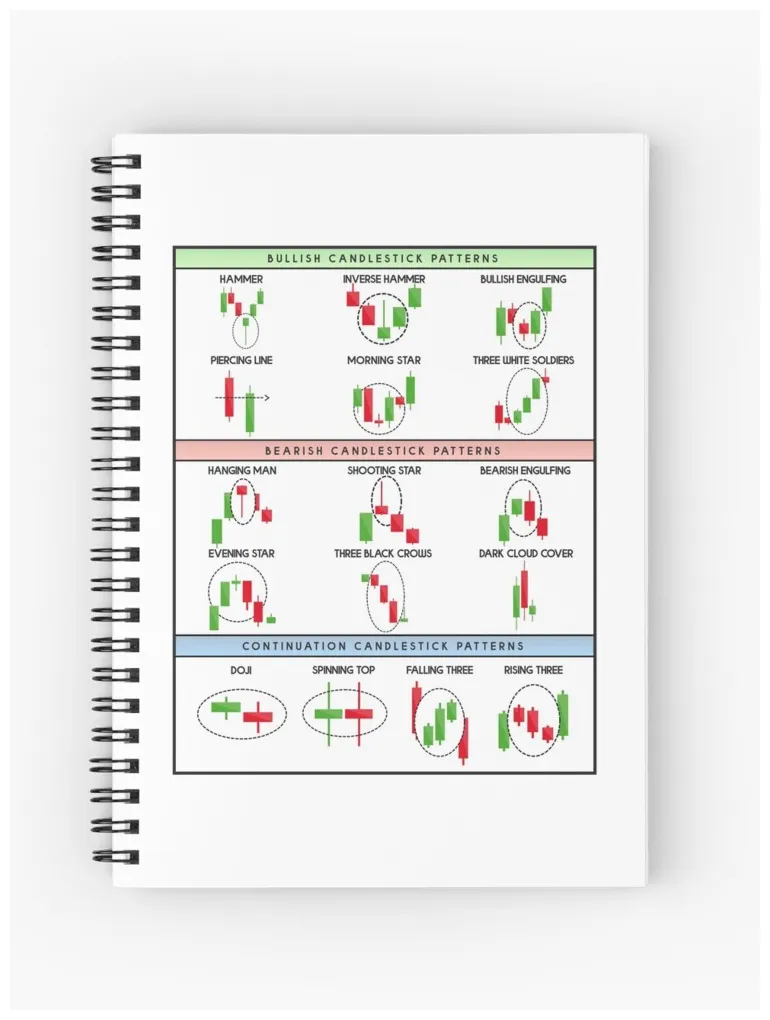
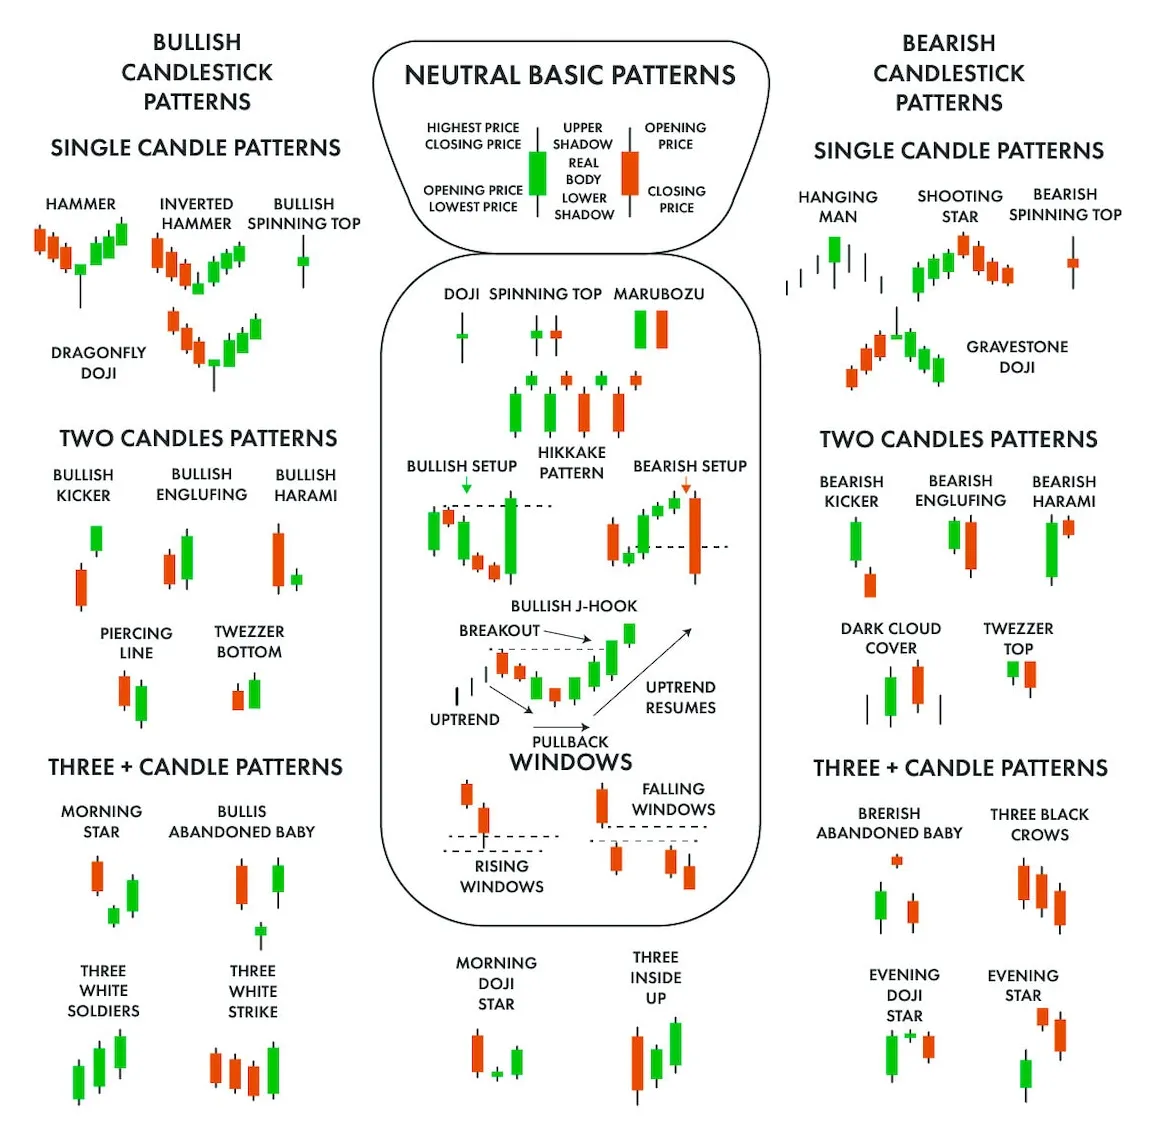
Candlestick technical analysis explained
This is image 2 of 15 from the Gnosis Technical Analysis Candlestick collection.

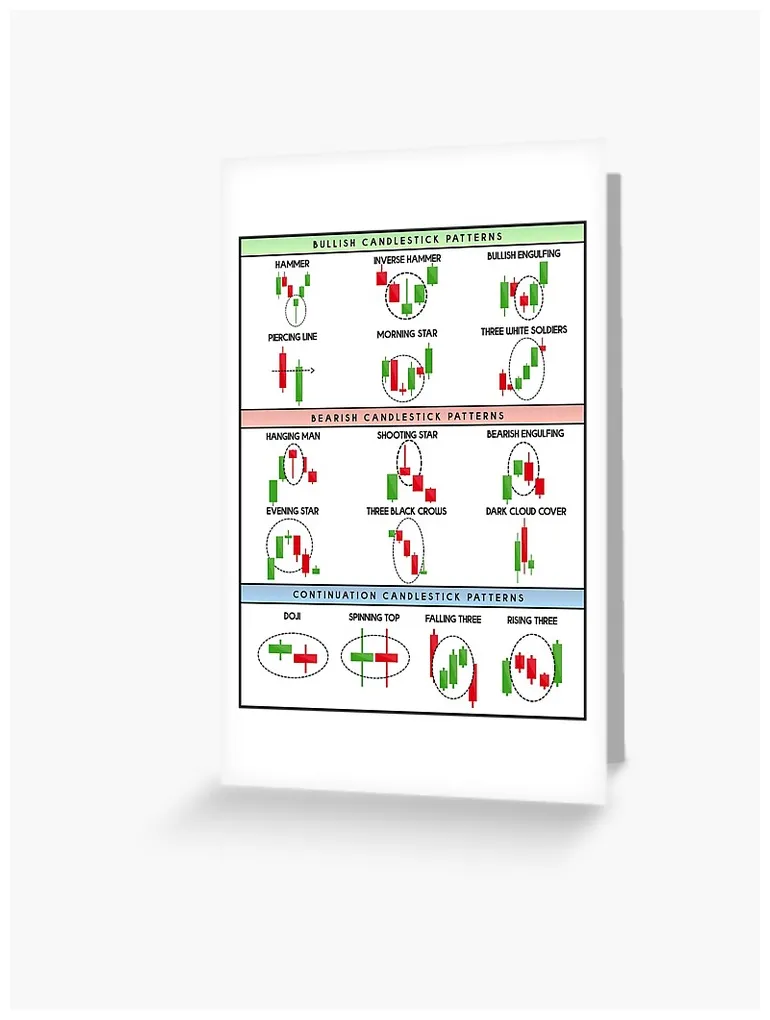
Candlestick technical analysis explained
This is image 2 of 15 from the Gnosis Technical Analysis Candlestick collection.